How to Copy and Paste a Selection in GIMP

A common problem in GIMP (a free and open-source image editor similar to Adobe's Photoshop) is not knowing how to select part of an image, copy it, and paste it into another image. This is a quick tutorial that teaches how to do that. This is as much for me as it is anyone else, because I forget how to do it every time I use GIMP.
We all miss Steve Jobs, so as an example, we'll be selecting Steve and adding him to the March 2019 Apple keynote
1. Get your images
First, you'll need your images. First, I have an image of the March 2019 Apple keynote.
 Next, I have an image of Steve Jobs at one of his keynotes.


2. Select the area
Once you have your two images, you'll need to select the area you want to copy. Because Steve is a person, I'm going to use the intelligent select tool, but you can use whatever select tool makes it easiest for you to capture the area you want.

Depending on which tool you're using, either click and drag or click at various points around the area until the area is completely encompassed inside the area you've drawn, then press enter to create a selection.

3. Float the Selection
Next, press Shift+Control+L or click "Float" from the "Select" menu. This will create a floating image that you can press Control+C or right-click and select "Copy" to copy, then Control+V or right-click and select "Paste" to paste into a different image.


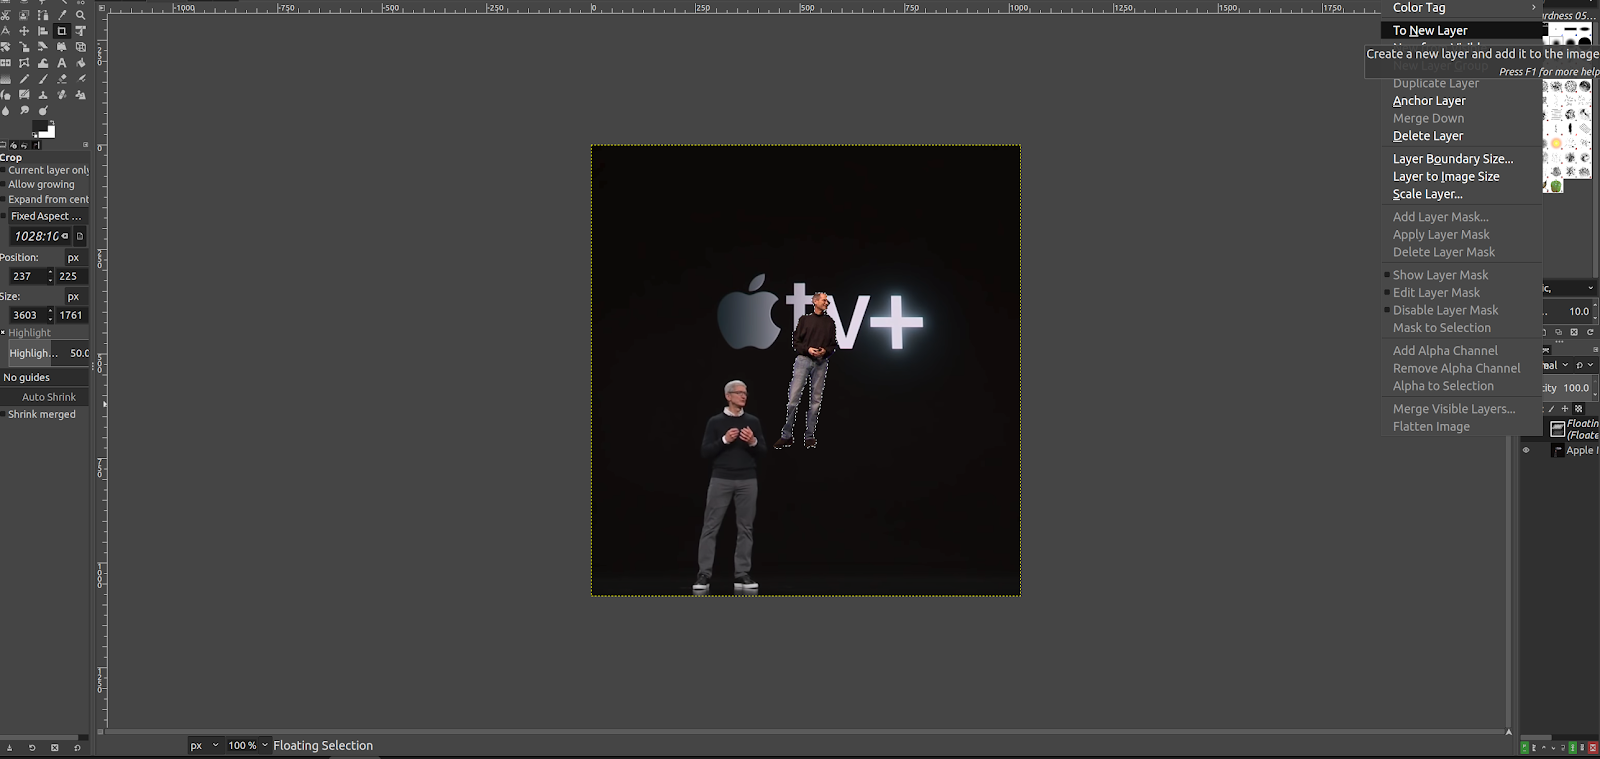
4. Add to a New Layer
Now that you've copied and pasted the floating selection into a new image, you can right-click the temporary layer it is on and select "To New Layer" to add it as a new layer to your second photo.
Now you can move it around, resize it, and edit it just as you would any other layer in GIMP.

Comments
Post a Comment